Getting Started
Table of Contents
Installation and Versioning
To install Ventuz, go to the Ventuz Download Page and download the appropriate installer. Ventuz is a rapidly developing software, with frequent updates. The primary number indicates the overall release family or version, for example Ventuz 5. The next number is the major release number. A major release contains new features and may break forward compatibility (i.e. scenes stored in a newer version may not be able to load in an older major version). The minor release number indicates the respective update of a major release. Minor releases contain as little changes to the software as possible to ensure the uttermost stability and will only contain bugfixes.
Example: Ventuz 6.01.02 (This is Ventuz 6 with the major release 1 and minor release 2.)
In general, you should download the latest version available, as it will contain all current bugfixes and the newest feature set. Some bugfixes require large changes in the software and cannot be done for a minor release. However, if you are working on a critical project and do not require any of the new features, you might want to consider only applying minor releases and sticking with the same major release until the project is complete. Regardless of the amount of testing, there is always the off chance with every code change that a new bug is introduced which remains undetected.
Note that you cannot have Microsoft Hyper-V activated on your Windows installation in order to run Ventuz with the Community or Core Editions. If you disable it on your system you may need to restart your machine several times until Ventuz can start properly again.
License Media
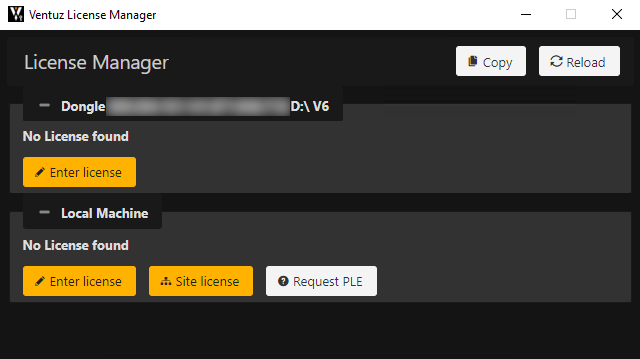
Upon start-up, Ventuz will check for any media with an already activated license. If it finds no such license, the Ventuz License Manager dialog will appear automatically. The License Manager lists all your Ventuz Dongles and your local machine info, and you can enter your License information and Key.
With Ventuz 6.6 and above we added the License Manager to the Web based Configuration Editor.
Online
| Supporting Editions | Community, Core |
|---|---|
| Internet Connection Required | YES |
| Transferrable to other machines | NO |
| Supported Purchase Options | free, perpetual |
When installing the Community or Core Edition you have the option to obtain an Online License. We will send a License Key to your registered e-mail address once you have obtained an according license. Use that key to activate the license on your machine (see below for more information on activation and registration). While being able to instantly install an Online License - because no delivery of physical goods is necessary - it requires a stable internet connection to operate and cannot be transferred to other machines.
Dongles
| Supporting Editions | Core, Enterprise |
|---|---|
| Internet Connection Required | NO |
| Transferrable to other machines | YES |
| Supported Purchase Options | perpetual |
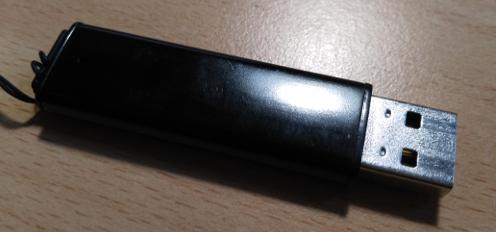
If you've purchased a Ventuz Dongle License, you are delivered the license code along with a trusted USB security device that you should plug into your computer, a USB Dongle. Dongles enable the use of Ventuz on different machines, since you can just re-plug it to any work station. With dongles you do not need a stable internet connection neither making the use of Ventuz in environments with higher security standards more viable.
Ventuz has used various dongle models along the years, some of them are not compatible with older versions or vice versa, so please use this table as a reference
| DONGLE PICTURE | VERSIONS SUPPORTED | STATUS | NOTES |
|---|---|---|---|
 | Ventuz 2008, Ventuz 3 | Deprecated | |
 | Ventuz 3 or newer | Deprecated | |
 | Ventuz 3 or newer | Deprecated | |
 | Ventuz 3 or newer | Deprecated | Serial engraved on USB Connector |
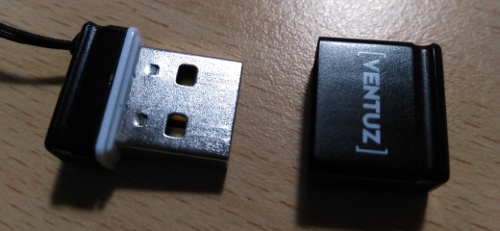
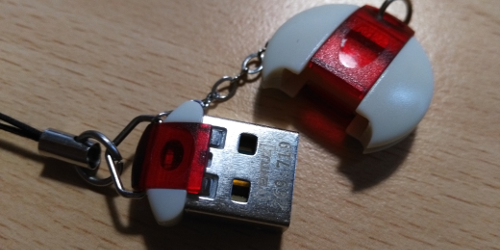 | Ventuz 4.7.2 or newer | Active | Serial engraved on USB Connector |
Trusted Platform Modules (TPM)
| Supporting Editions | Enterprise |
|---|---|
| Internet Connection Required | NO |
| Transferrable to other machines | NO |
| Supported Purchase Options | perpetual |
If security standards prohibit the use of USB Devices it is possible to test a system license against a Trusted Platform Module. Also if the delivery of hardware might be a problem this option can become interesting. This option is available for purchased licenses only (Core and Enterprise). Using a TPM bypasses the need for an internet connection but still is bound to a single work-station. Like online license keys, TPM keys are distributed over e-mail.
Ventuz currently supports Infineon TPM Modules with TPM version 2.0, namely the OPTIGA™ TPM SLB 9665 series.
License Management
Registering & Activating
Together with your product dongle you should have received a License Certificate, please make sure to keep it in a safe place - you could be asked to send this info when solving license problems in the future. Also make sure to save your license key in case you have received it via e-mail.
If you have received a new dongle, it should contain an empty license, and you just have to click on Update License in order to download the latest license keys associated with this dongle.
When you are running your license for the first time or if your dongle does not contain any license keys, you must click on Enter License, and a new screen will appear (see below). The same goes with system and TPM licenses. You should fill in this form with your Licensee User, Company and Contact Email information, and with the License key information provided on your License Certificate.
After you fill in the form and press the Ok button the activation process will create a license file on your dongle.

In order to activate a license, an active internet connection and a Ventuz USB Dongle is required. Once the license has been activated, the connection is no longer required. Only the dongle must be attached to the machine.
Please insert only one dongle. Licensing does not work with more than one dongle inserted in your computer. It is also recommended that you disconnect any external USB hard disk drives connected to your computer prior to licensing.
On dongle models prior to Ventuz 5 (Rounded, White and Red, check table above), license file is accessible from within Windows Explorer, so please make sure not to remove, rename, delete or otherwise modify this file. In addition, it is recommended that you create a backup of this file.
On Ventuz 5 dongle (Rounded, White and Red, check table above), this information is only accessible by clicking on the "Copy License Details" button, which copies the License and Licensee information to the clipboard so you can keep a backup copy. Nonetheless it is strongly recommended that you keep your License certificate in a safe place as mentioned above.
Update License
If you already have a Ventuz License and want to add additional Ventuz Features you can start the License Manager tool and update the Ventuz License with the new purchased Ventuz Features.
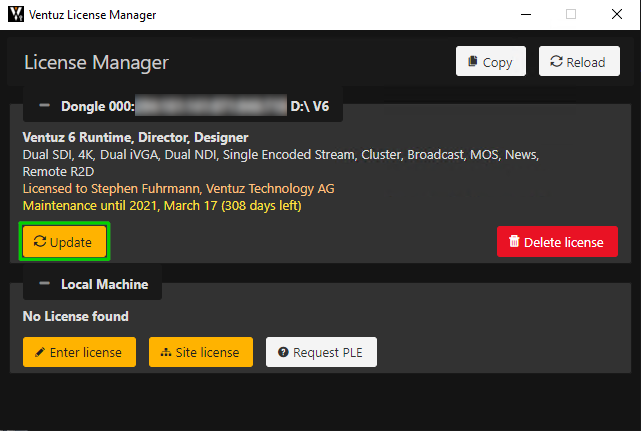
A green border around the Update License button signals that the button needs to be pressed because the local license is not up to date as it has been modified on the license server (e.g. customer purchased a new feature like SDI out).
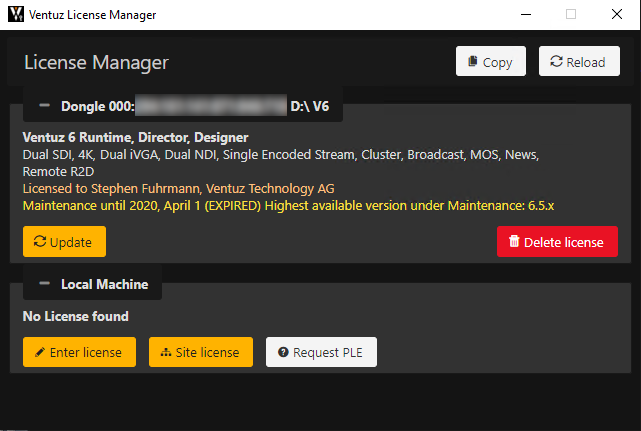
Expired License
If you start Designer, Director or Runtime and only get the License Manager with red text in the license panel then your Maintenance is expired and the Ventuz version that you have installed is too new and not covered by your maintenance period anymore. In such a case please contact your Ventuz reseller or sales_at_ventuz_dot_com. Highest available version under Maintenance tells you which is the highest Ventuz version that will run with your license. You can get it here: https://www.ventuz.com/archive
Other Licenses
Prototyping & Learning Edition (PLE)
In case you haven't decided yet whether or not to buy the Enterprise Edition and want to test its featureset, you can use the free Prototyping & Learning Edition (PLE). This is a fully featured, non-time restricted trial version of the Professional Edition. The only difference is that a Ventuz watermark will be visible in the rendering output. A PLE license code can be requested free of charge from the Ventuz License Manager.
The Prototyping & Learning Edition is offered for evaluation purposes only. Scenes built in PLE cannot be loaded in any other Ventuz version even if a full license is bought later on!
Not For Resale (NFR)
Ventuz Partners can, in certain circumstances, receive a Not For Resale, or NFR for short, version of their licenses. This NFR version features some limitations compared to standard commercial versions, and it is strictly forbidden to use these licenses for any commercial or paid project.
Ventuz NFR licenses show a warning splash screen when opening the software and feature an NFR logo on the interface. As opposed to PLE version, NFR licenses do not feature a watermark on the output, so they can be used for training, demos and the like.
All scenes saved with NFR version will be marked as NFR only and will show the NFR warning screen when used on other Ventuz Commercial versions - be careful not to open standard projects on Ventuz NFR licenses or they will switch to NFR projects!
Ventuz Designer
First Launch
Assuming an active license is available, you will be presented with the Ventuz Project Browser. You could create a new project and dive right into the software but first time users are strongly advised to use one of the many learning resources. Due to the complexity and shear number of possibilities of Ventuz, trying to create a first scene from scratch can be frustrating at best.
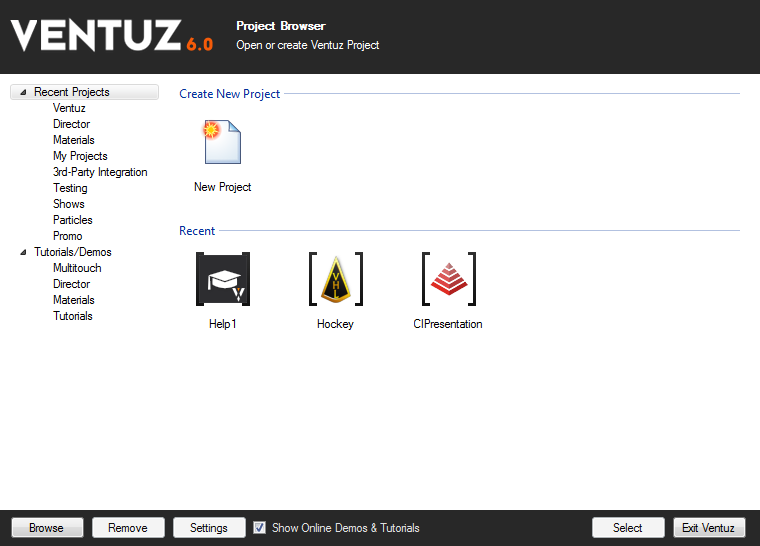
Tutorial/Demo Projects
Ventuz provides several Tutorials and Demos to help you start with the software in general or with a specific use case. In the Project Browser make sure that you have the Show Online Demos & Tutorials option is enabled. Then you can browse through the Tutorials and Demos and download any project of interest. These projects always open a description with steps to use the presentation and also describing the general structure and important approaches to the showcased solutions.
Dynamic Help
Ventuz features a Dynamic Help System so you are never left to your own devices. When activated via Menu/Tools/Dynamic Help (or by pressing SHIFT + F1), a yellow bar is added to the bottom of the application window. It contains the name and short description of whatever the mouse is hovering over. By pressing F1, you will be presented with a list of available help items, whether it be entries in the user manual or example scenes.
User Manual
In addition to the Dynamic Help, this user manual contains in-depth knowledge, how-tos and much more. While it is intended more as a reference guide than a book, the Start Page and subsequent help pages have been structured to accompany you while you delve deeper into Ventuz. Especially make sure to have a look at the How Tos and the Overview of the Designer.
Video Tutorials
Lastly you can always find video tutorials on the Ventuz Youtube Channel. Additionally to showing the basics of the software there are also a lot of small video snippets show casing several features or ways to use Ventuz.
Ventuz Director
Ventuz Director is a template-based show control application introduced with Ventuz 4. Where the Ventuz Designer is an authoring tool used to design visually rich and highly interactive 3D content, Director focuses exclusively on the job of using such content as part of a larger show.
For an introduction to the Ventuz Director, see the Director Introduction.
Feedback and Forum
If you have feedback on this documentation or the software application itself, the preferred way is to join our community and post on our Ventuz Forum. Let us know if certain aspects need further documentation or the existing documentation is unclear. By using the forum, other Ventuz users with similar problems can benefit from your contribution and the Ventuz Team can answer your questions once and for everyone.
You can also use the Feedback Button in the top right corner of the application. Please make sure to enter your email address and as much information as possible so we can get back to you in case of questions or if we've found a solution to your problem.