Navigation

Ventuz 6 Quick Guide

  • Introduction
  • Getting Started
  • Ventuz Editions
  • Designer Overview
  • Ventuz System Requirements
  • Configuration
  • Video/Audio Configuration
  • Machine Configuration
  • GPI Configuration for Runtime or Director
  • Optimize Rendering Performance
  • Supported Formats
  • Supported Hardware
  • Multisampling / Anti-Aliasing
  • Input Subsystem
  • Ventuz Proprietary Files
  • What's new
  • FAQ
  • Common Mistakes
  • Deployment
  • Migration Guide
  • Ventuz 5 Migration Guide
  • Summary Shortcuts

Ventuz 6 Designer

  • Index
  • Getting Started
  • Designer Options
  • Designer Overview
Projects & Scenes
  • Projects and Scenes
  • Project Browser
  • Project Properties
  • Project Maintenance
  • Project and Scene Data
  • Scene Tree
  • Scene Management
  • Scene Statistics
  • Deployment
Interface
  • Designer Interface
  • Renderer Window
  • Realtime Rendering
  • Optimize Scene Performance
  • Performance Statistics
  • Transformation Gizmo
  • Render to Disk
  • Camera Navigation
  • Isolated Objects
  • Manipulate Objects with Gizmos
  • Layer Editor
  • Common Layer Properties
  • IPP Effects
  • Color Correction FX
  • Distortion FX
  • Filter FX
  • Layer Editor Shortcuts
  • Hierarchy Editor
  • Working with Nodes
  • Containers
  • Find and Replace
  • Shortcuts Hierarchy Editor
  • Content Editor
  • Working with Nodes
  • Containers
  • Content Editor Shortcuts
  • Toolbox
  • Property Editor
  • Project Data and Scene Data
  • Property Groups
  • Shader Editor
  • Text Editor
  • Scene Tree
  • Message View
  • Stage Editor
  • Container Outline
  • Watches Editor
  • Animation Editor
  • Animation and State Engine
  • Templates
  • Template Engine
  • Shortcuts Animation Editor
  • Text Rendering
  • Text Editor
  • Character Sets
  • Geometry Import
  • Input Subsystem
  • Multitouch
  • TUIO Protocol
  • Open Sound Control
  • How to work with Head Mounted Displays
  • Cluster
  • Multi Display Setups and Shaping
  • Warping, Soft Edging and Masking
  • Available Nodes
  • Animation Nodes
  • Material&Color Nodes
  • Data Nodes
  • Geometry Nodes
  • Interaction Nodes
  • IO Nodes
  • Layers
  • Light Nodes
  • Logic Nodes
  • Render Option Nodes
  • Slides Nodes
  • Sound Nodes
  • Text Nodes
  • Texture Nodes
  • VR Nodes
  • World Nodes

Ventuz 6 Node Reference

ANIMATION
  • Mover
  • Alternator
  • Simple Control
  • Timeline Control
  • Anmation Rig
  • Keyframe Animation
  • Animation Group
COLOR/MATERIAL
  • Alpha
  • Fog
  • Ground Fog
  • Sky Box
  • Color to RGBA
  • HSLA to Color
  • RGBA to Color
  • Color Transformer
  • HLSL Shader
  • Color
  • Material
  • Color Picker
  • Substance Material
DATA
  • Database
  • Excel
  • JSON
  • RSS Feed
  • Resource Linker
  • Text File
  • XML
GEOMETRY
  • Rectangle
  • Rounded Rectangle
  • Gradient Rectangle
  • Overlay Rectangle
  • Cube
  • Circle
  • Sphere
  • Cylinder
  • Cone
  • Torus
  • Chart
  • Random Points
  • Mesh Loader
  • Geometry Import (Live)
  • Volume
  • Get Bounding Box
  • Arrow
  • Particle System
  • Path Renderer
  • Geometry Renderer
INTERACTION
  • Interaction Rect
  • Touch Button
  • Touch Excluder
  • Touch Marker
  • Touch Paint
  • Touch Pattern
  • Touch Proxy
  • Touch Ripples
  • Touch Transformations
  • Web Browser
  • Touch Teleport
  • Touch Simulator
INPUT/OUTPUT (I/O)
  • GPI
  • Joystick
  • Keyboard
  • MIDI
  • Mouse
  • Network
  • Open Sound Control
  • Serial
  • Timecode
  • DMX
LAYER
  • 3D Layers
  • 3D Layer Reference
  • 2D Layers
  • PSD Import Layer
  • Others
LIGHT
  • Light Sources
LOGIC
  • Array Processing
  • Convert To Text
  • Cluster Synchronization
  • Counter
  • Date Time
  • Directory
  • Dispatcher
  • Enumeration
  • Expressions
  • Invert
  • Log
  • Loop Breaker
  • Math Effects
  • Matrix Operations
  • Scene Event
  • Script
  • String Operations
  • System ID
  • Text Splitter
  • Timer
  • Toggle
  • URL
  • Value Switch
  • Value Buffer
  • Variables
  • Visual Indexer
RENDER OPTIONS
  • Alpha Blending
  • Color Write
  • Alpha Testing
  • Clip Plane
  • Filter
  • Mask
  • Mirror
  • Effect
  • Render Cube Map
  • Draw Modes
  • Stencil
  • ZTesting
SOUND
  • Audio Clip
  • Sound
  • Volume Control
  • Audio Analysis
SLIDES
  • Slide Manager
  • Slide
  • Slide Port
  • Pivot
TEXT
  • Text Effects
  • Text Layouts
  • Text Rendering
TEXTURE
  • Background
  • Hatch
  • Image
  • Texture
  • SVG Loader
  • Gradient Texture
  • Live Video
  • Movie Stream
  • Movie Frame
  • Movie Clip
  • Texture Loader
  • Snapshot
  • Snapshot Framebuffer
  • Texture Saver
  • Video Source Selector
  • VIO Input
  • Spout Receiver
  • NDI Receiver
  • Substance Loader
VR/AR
  • Tracked Devices
  • Draw Tracked Devices
WORLD
  • Axis
  • Billboard
  • GetWorld
  • SetWorld
  • Arrange
  • Ticker
  • Layout
  • Group
  • World Z Sort
  • YesNo
  • Switch
  • Spread
  • Filter Pass
  • Set Pass
  • Hierarchy Container
  • Scene Port
  • Content Container
  • Template Port
  • Container Info
  • Camera
  • Paths

Ventuz 6 Configuration Editor

  • Configuration
  • Machine Configuration
  • Video/Audio Configuration
  • Web Configuration Editor and License Manager
  • Render Setup Editor
  • Warping and Soft-Edging Editor
  • Supported Hardware
  • How to Setup a Cluster Render

Ventuz 6 Director

  • Application Settings
  • Assets
  • Channels
  • Command Line Options
  • Content References
  • Designing Templates
  • Environment
  • Glossary
  • Index
  • Introduction
  • Pages
  • Playlist
  • Plug-Ins
  • Project Data
  • Property Editor
  • Shortcuts
  • GPI Configuration
  • Shot Box
  • Show
  • Taking Action
  • Timeline
  • Topology
  • User Interface
  • Director Mode
  • Macros

How To

  • How to Run Ventuz
  • How to Work with Designer
  • Ventuz Designer Drag&Drop workflow
  • How to use Head Mounted Displays
  • How to work with Shadows
  • How to use Emoijs
  • How to Build a Template
  • How to use Newtek NDI
  • How to Create Visuals Loader Node
  • How to Remote Control with a Phone
  • How to Setup a Cluster Render
  • How to use a Mixed Frame Rate Cluster
  • How to use Tracking
  • How to work with 3D Reference Layers
  • How to create a Firework Particle System
  • How to use DDS with new Block Compression modes
  • How to setup Spout with Ventuz
  • How to use the Substance Integration

Keyboard Shortcuts

  • Summary Shortcuts
  • Layer Editor Shortcuts
  • Hierarchy Editor Shortcuts
  • Content Editor Shortcuts
  • Animation Editor Shortcuts
  • Director Shortcuts

Advanced and Development

  • Command Line Options
  • Remoting Overview
  • Remoting 4
  • Remoting 4 via Websockets
  • Deprecated Remoting
  • Ventuz IP Ports
  • Ventuz Machine Service
  • Remoting Machine Signature
  • TUIO
  • .NET Scripting
  • HLSL Shader Programming
  • Ventuz API and SDK
  • Ventuz VIO API
  • Ventuz File Format (VFF)
  • Ventuz Stream Out API

General Reference

  • Terminology
  • Manual Index

Miscellaneous

  • Presets
« Previous Article
» Index «
Next Article »

How To Create a Visuals Loader Node

Table of Contents

  1. Introduction
  2. Setup
  3. Inner Structure of the Content Container
  4. Inner Logic of the Node
  5. Usage of the Node
  6. Conclusion

In this tutorial you will learn how to create a reusable node, that loads any kind of visual element and provides its data as a texture directly to a 2D Layer or to a Material inside a 3D Layer.

Introduction

In some cases it is not predefined whether the data you may use for a texture is always an image or a movie. Internally Ventuz handles data types of such visuals in different ways and a designer has to work a way around those differences. A node has been created for this to become possible: The Visuals Indexer Node. We will create a Content Container which contains this node to handle this. The result can be saved into the project repository for later reuse.

This node will especially come in handy when using the Ventuz Director. You can then create Templates with selectable Textures and Movies (or even Live Videos) and the operator of the Director does not have to care about the source of the texture.

Setup

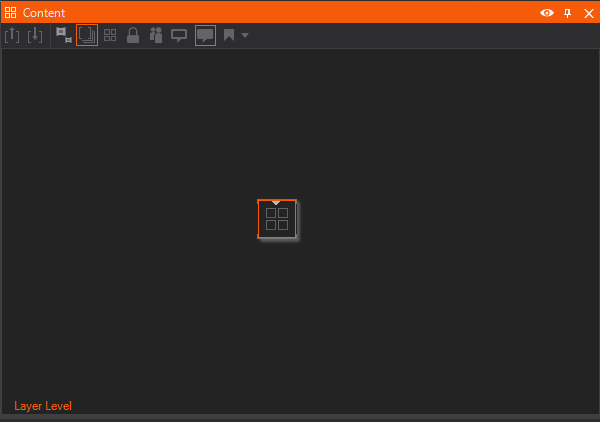
We will start up with a one single node located in the Content Editor on the Layer Level in your scene:

Next you will need an example file for each of the visual formats for testing the node. Place them in the respective directories:

  • An image file
  • A texture file
  • A movie file

You may also configure an input for a Live Video.

Inner Structure of the Content Container

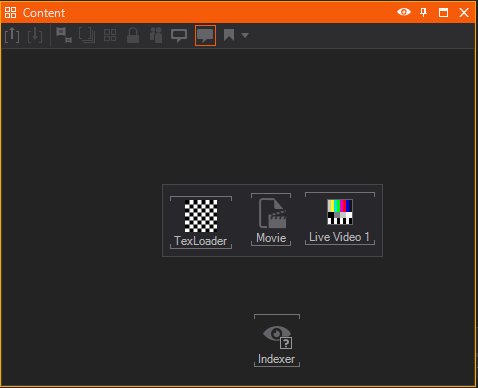
Double click  the small gray triangle in the Content Node. You should now see a blank Content Editor and an empty Hierarchy Editor. Firstly you will need to create four Nodes:

  • A Texture Loader to load Images and Textures
  • A Movie Clip Node to load movies
  • A Live Video Node to display Live Video inputs
  • A Visual Indexer Node to interpret incoming URI's

The result should look similiar to this:

Inner Logic of the Node

The Visual Indexer node has two Input Properties. Firstly the Uri, which defines the path of the file one wants to inspect and secondly a TreatTextureAsImage boolean which prevents the node from handling texture files differently from image files. Since the Texture Loader can also handle image files, we check this property and hence ignore the Texture outputs of this node.

Now you can bind the File property of the TexLoader node to the ImagesUri output of the Visuals Indexer. Drag  the File property onto the Visuals Indexer node and choose the ImagesUri output in the dropdown list.You can now bind the File property of the Movie Loader node to the MoviesUri output of the Visuals Indexer node. Repeat this for the Live Video node and also bind the Ordinal Property.

Now each of the three nodes load the right type of file. That is due to the Visuals Indexer, which inspects the file specified in its Uri input and passes it to that output corresponding to the file type.

Because we want to design our container in the way that we can input an uri and get the corresponding Texture on the output of the container we need to find a way to switch the Texture Properties based on the incoming uri. To do so we use a Value Switch and connect all the Texture ouputs to the Value Switch. To switch the Case property based on the !XXXInvalidUri output of the VisualIndexer we can simply use an Int Expression, create three BOOLEAN inputs via the Custom Model and connect them. The respective expression can look like the following based on the naming of your inputs.
!ImageInvalid ? 0: !MovieInvalid?1: !LiveInvalid?2:-1

Lastly all you need to do is expose the Uriproperty of the Visuals Indexer and the output of the Value Switch so that one can choose a file from outside the Content Container and get the respective Texture. To achieve this you need to click  the little square left to the property. If you want to rename it for better recognition outside the container double click  and change the properties as you like it.

To exit the Content Container press Level UP or use the shortcut CTRL +  U Now you can rename the Container (to e.g. "Visuals Loader") and change its Node Icon and finally drop it onto the Project Repository for later reuse in your project.

Usage of the Node

Your own custom Node can now be used as an input for a 2D Layer Texture Property or as an input for a Material Node.

Conclusion

You now have a node that can load any visual file as a texture. When using this node as part of a Ventuz Template an operator of the Ventuz Director does not have to care about the file types he is loading as an asset into a template's properties.

You may now want to learn more about the Ventuz Director or read more on how to create templates. See the following sites to get more information about this feature of Ventuz:

See also:
  • How-To: Creating a Director Template
  • Documentation on the Template Engine
  • Documentation on the Ventuz Director
  • Visuals Indexer Node
  • Machine Configuration

« Previous Article
» Index «
Next Article »
Copyright 2020 Ventuz Technology