How to use NDI
Table of Contents
This How To will show you how to setup, create and use NDI streams and is written for beginner to intermediate level users.
Introduction
NDI is a network device interface that can be used to create or receive video streams over the network. You can use NDI Streams as an INPUT or create an OUTPUT and broadcast the output via NDI. You can simply install the NDI Tools use the NDI Scan Converter and select a window, screen, program as a Stream Source and use that stream in Ventuz. Or, you can use Ventuz and stream your content directly via NDI and access or view the Ventuz content stream on any machine which has an NDI Video Monitor.
Setup NDI Inputs
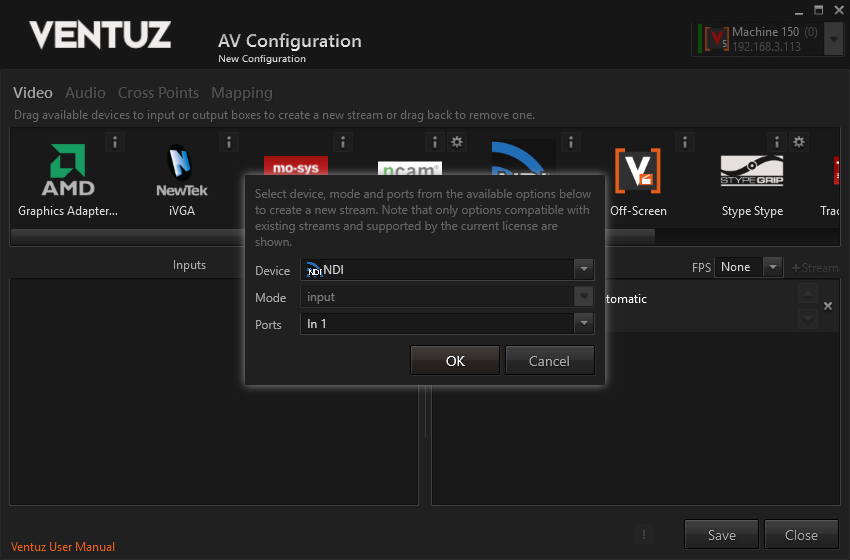
To setup a NDI Input, simply drag and drop the NDI icon from the Devices top bar into the Inputs section.
A dialog box will pop up where you can define which Port should be used as input.
Input Properties
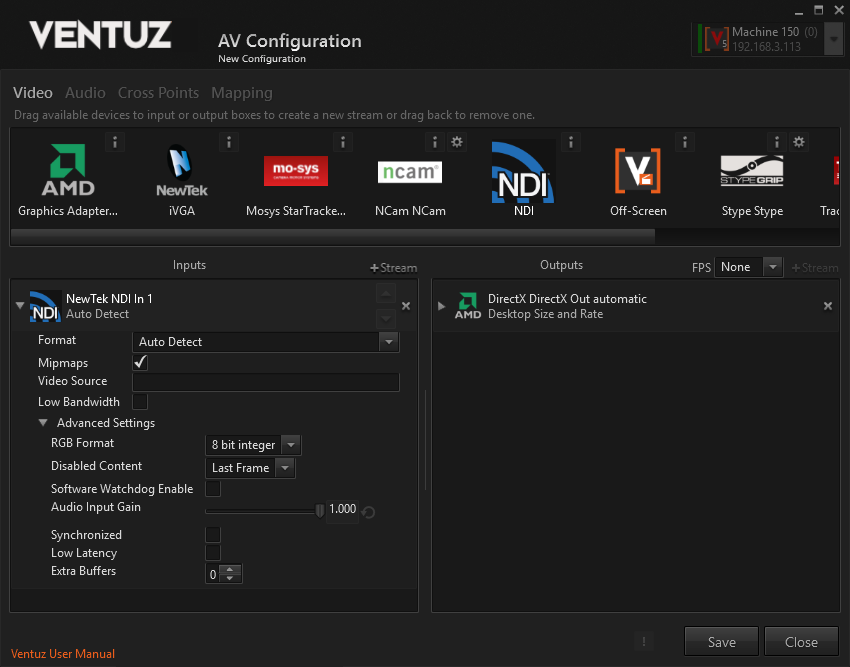
Click the small triangle in front of the NDI Input Source to unfold the NDI Properties as well as click the small triangle in front of the Advanced Settings. This will show you all available properties for the selected NDI Input:
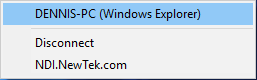
- Video Source: here you can type in the Video Source if you already know the string. The formatting would look exactly like this : VENTUZ-PC (Windows Explorer). If you already have a NDI Stream available and use the NDI Video Monitor to select the Source, you see the exact string you would need to type in. See the Screenshot taken from the NDI Video Monitor selection :
- Low Bandwith: this checkbox enables a low bandwith stream.
For more detailed information about the Advanced Options please refer to the usermanual Advanced Input Options.
Setup NDI outputs

To setup a NDI Output, simply drag and drop the NDI icon from the Devices top bar into the Outputs section.
A dialog box will pop up where you can set the output mode to output or external keying as well you can define the Port from Out A to Out D.
Depending of your licensed output options you can also configure multiple outputs.
Output Properties
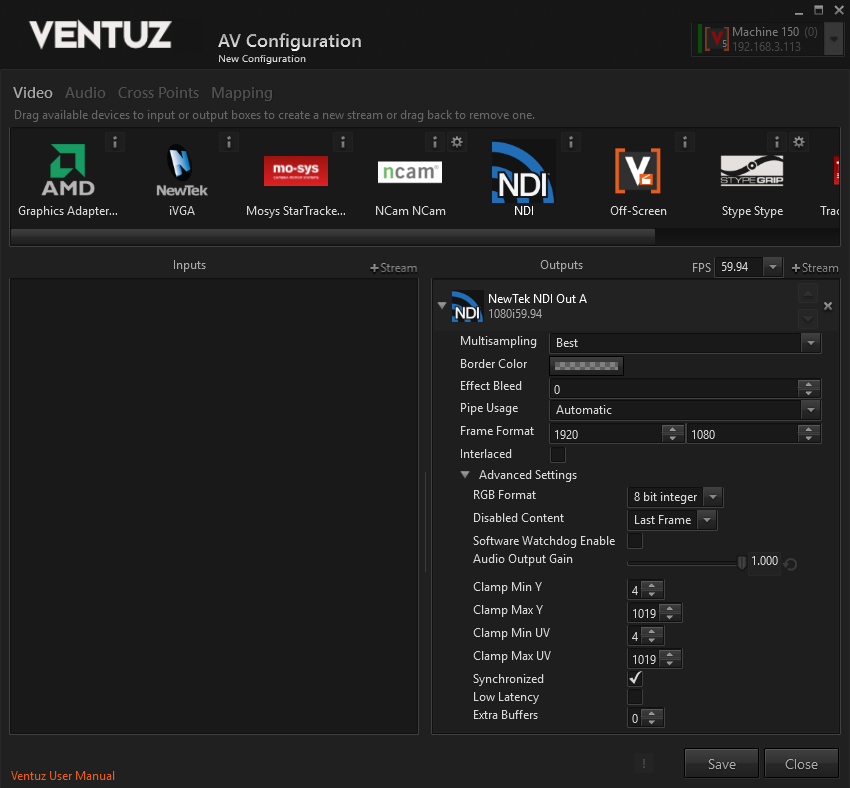
The Format Options shows you all the output Formats supported by NDI out.
For the rest of the output properties please refer to the Standard Options or Advanced Options.
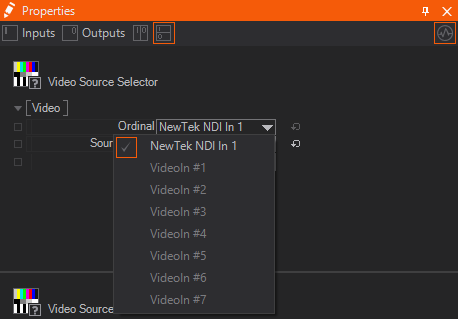
Video Source Selector Node
 | Video Source Selector | This node allows to select different available sources and activate them. |
You can use the Video Source Selector node to select and/or switch between the different NDI inputs. Click on the ordinal and select your NewTek NDI In here.
NDI Tools
The NDI Tools are delivered by Newtek and can be found and downloaded here. You can find detailed information about NDI and their tools as well.
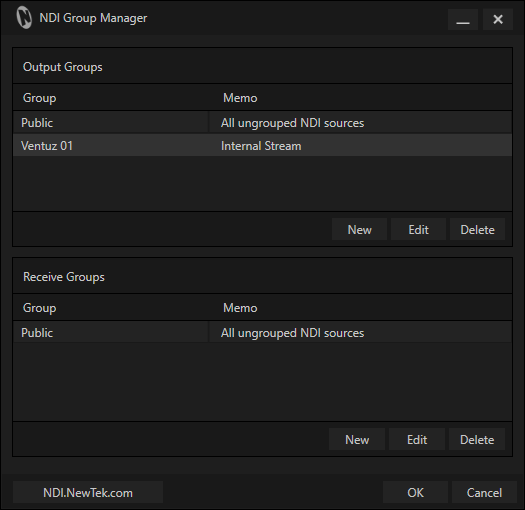
Group Manager
| Icon | Description |
 | The NDI Group Manager organizes NDI sources into groups |
You can determine if those sources are public or private. It is also possible to define the visibility of your streams based on device or system.
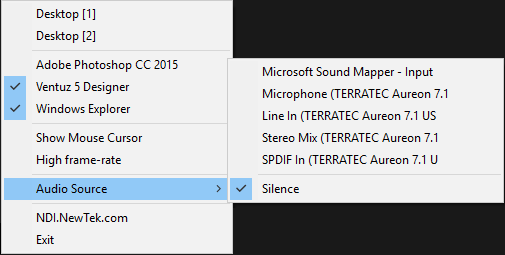
Scan Converter
| Icon | Description |
 | This is the tool to create a NDI Stream with |
You can install this tool for example on a Laptop, set your presentation window as a source and stream it into your network.
click on the NDI Scan Converter icon and select your Audio and/or Video source as well as to use the High frame-rate.
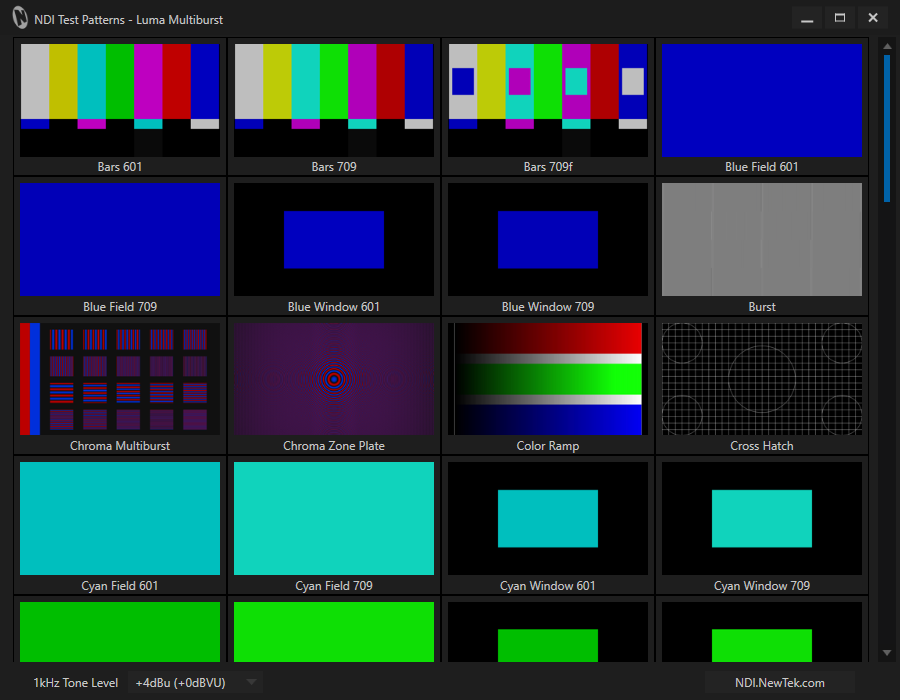
Test Patterns
| Icon | Description |
 | This tool just sends a reference Video and/or Audio |
The tool to test your stream and your network with, as well very handy to test and adjust the quality settings for your Scan Converter. You can chose from a wide variety of Testpatterns.
Video Monitor
| Icon | Description |
 | The NDI Video Monitor |
With this tool you can watch any NDI stream and turn any Laptop or Workstation into a Video monitor and enjoy the Live Feed.
Practical Example