Ticker and Layout
Table of Contents
 | Ticker | This node provides the functionality to create advanced tickers, crawls and rolls via the Arrange node. |
 | Layout | This node provides the functionality for simple layout via the Arrange node. |
General
The Ticker and Layout nodes are so called Arrange Controllers that can be bound to the Control property of an Arrange node. They override and extend the Arrange nodes default behavior in how child nodes are positioned, oriented and so on to fit a variable amount of data to a limited amount of space.
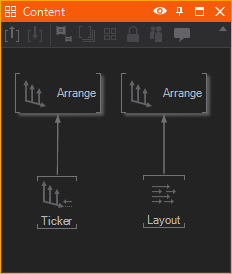
The Ticker node sequentially inserts each child at one end of the ticker area, moves it across and removes it again once it has left the area. As soon as one child has completely entered the ticker area, the next one is inserted behind the previous one to create a constant stream of information. The Layout node arranges items horizontally up to the layout width and then creates a line break to position exceeding items in the next line.
Arrange Controllers can be used to either present the information contained in the Arrange nodes children or to use the child nodes as mere vessels to present dynamically changing information. Such information is passed to the controller via the Data property.
Both Controllers have a DataMode property to enable the dynamic data driver mode. As long as DataMode is None the Data property is ignored.
Non-Dynamic Data
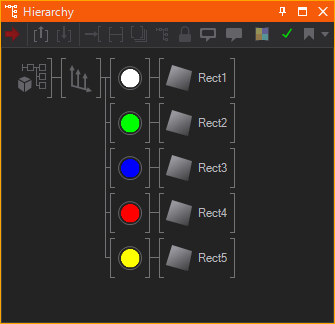
Same as without an Arrange Controller, the Arrange node will treat each of its children (and the subtree originating from them) as a separate entity. By setting the DataMode property to None, an Arrange Controller will only control the position, orientation and scale of each of those entities but not change any of the properties of the nodes themselves.
Layout
The Layout node in Non-DataMode arranges items automatically based on their size and content. This is very useful for text blocks or images embedded in text. Paragraphs could be separated in several single text elements which are layouted automatically. Changing the size of any element of the layout will re-arrange them immediately. This makes the Layout node very interesting for text elements containing dynamic images (smileys, logos, etc).
For the Layout controller to work, the Arrange node has to be set to LeftChain (Left-To-Right reading) or RightChain (Right-To-Left reading) for AlignmentX. Other layouts are not supported yet. AlignmentY and AlignmentZ are ignored.
The Width property of the Layout controller defines the available area to layout the elements where the ChainOffsetX is inserted between every element. If a line exceeds the available Width a line-break is inserted and the next line will start with an Y offset defined in ChainOffsetY.
Remember to set a ChainOffsetY, otherwise the line break will cause the new line to be drawn over the previous one!
Ticker
The Ticker in Non-DataMode can be used to scroll elements through a visible area that is not large enough to fit them at the same time. Invisible elements are automatically blocked and therefore not rendered which saves rendering performance. In addition, changing the order or number of elements becomes easier compared to having manually positioned the elements via Axis nodes.
The Direction property of the Ticker is used to specify whether the elements underneath the Arrange node are moved as a crawl (X), roll (Y) or as a depth-flight (Z). The Alignment property of the Arrange node corresponding to the direction will be ignored but all other alignments remain valid.
The Width property defines the range where elements are shown and tickered in and out. A new element is inserted at the beginning of that range and moved until the last part of its bounding box clears the range. As soon as one element has completely entered the range, the next item will be inserted. By using the ChainOffset property of the Arrange node, additional spacing can be inserted between consecutive elements.
If the total width of all elements chained together including the ChainOffsets does not fill the requested Width the Ticker can behave strangely and elements pop in inside the visible range. So always provide enough elements to fill the entire range!
Use a stencil or a mask to clip rendering of the ticker content to the width of the ticker. This will stop elements suddenly appearing and disappearing on their entire length once they hit one of the boundaries of the ticker area.
Elements are always rendered in the order they appear in the hierarchy. For some tickers (i.e. depth-ticker) the order has to be adjusted to maintain transparencies. The Sorting property enables the position based sorting.
If SpeedMode is set to TimeBased the Speed property defines the speed of the movements in units per second. A value of 1 defines that the elements are moved by the amount of 1 in one second. In FrameBased speed mode the ticker moves the elements by a 10th of the Speed value every rendered frame. If the renderer skips a frame the ticker will stop in this mode and continues exactly at the next position, where TimeBased tickers skip some positions to keep in-sync with the global timing.
Dynamic Data
The amount of data and its specific content may not be known during design time of a scene. For such situations, the Arrange Controllers can be used in a different manner: Instead of storing the information in the child nodes, it is dynamically passed to the controller as XML via the Data property. When the DataMode property is different from None, the controller will pick one of its children for each piece of information it wants to present and simply overwrites property values (for example the string shown by a text label).
To make this work, the string passed to Data has to be formatted by an XML-like markup. Only XML elements and attributes are used, all other XML markup - including the values (text) of elements - is ignored. When a new piece of information is to be shown, the Arrange Controller will look for a direct child whose name matches the name of the XML element. On this node, it checks for properties which matches the name of one of the XML attributes and assigns the corresponding value.
In general, one would use a Hierarchy Container, assign it a name and expose properties to be addressed by the Arrange Controller. For example, an element for displaying a stock quote in a crawl could expose properties such as Name, LastTrade and Change. The internal logic of that quote container could manage the display of a colored arrow for positive and negative Change values. The container itself could simply be named "QUOTE". Setting Data to
<QUOTE Name="MSFT" LastTrade="123.25" Change="4.125"/>
would use a child node of name QUOTE, set Name to MSFT, LastTrade to 123.25 and Change to 4.125.
Attribute values are always parsed using the Invariant Culture (en-us) to be converted to the type of the target property. String values have to be HTML encoded in order to contain special characters such as < or >. Use < and > instead.
If the scene requires displaying multiple elements of the same type at the same time (a stock crawl usually displays multiple quotes within one line), multiple copies of the element have to be created and added as children of the arrange node. The Arrange Controller keeps track of which nodes are currently already in use and uses the child nodes as a pool from which it can temporarily acquire elements.
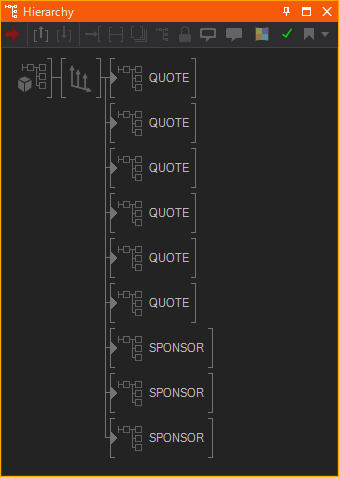
The name of the Container could be understood as the type of element. All instances of a type should provide exactly the same visual content as well as the same properties and functionality. A very comfortable way of maintaining copies of typed container is the usage of the Interface technology of Ventuz.
There's no control about which element is actually addressed. The Layout and Ticker nodes simply use the next available element. For the Ticker this means an available element which is not visible on screen (not already used).
Multiple elements are address by multiple XML elements in one XML text.
<QUOTE Name="MSFT" LastTrade="123.25" Change="4.125"/>
<QUOTE Name="AAPL" LastTrade="67.75" Change="2.125"/>
<SPONSOR Image="MySponsor.jpg"/>
The XML data text does not have to be well formed. The used XML parser is very error tolerant. XML processing instructions and namespaces are not supported!
Layout
Setting the Data property of the Layout node makes all elements available first, then the XML elements are parsed, elements are selected, reordered and configured.
The following XML Data selects two QUOTE elements followed by one SPONSOR element. All other (unused) elements will be blocked internally (hidden). The remaining (visible) elements will be positioned on screen following the setting of the Arrange and Layout nodes.
<QUOTE Name="MSFT" LastTrade="123.25" Change="4.125"/>
<QUOTE Name="AAPL" LastTrade="67.75" Change="2.125"/>
<SPONSOR Image="MySponsor.jpg"/>
Ticker
Setting the Data property of the Ticker node will parse the data and append so called TickerItems to the internal queue. This queue can hold an unlimited amount of TickerItems.
Only an actual change of the Data property data will add TickerItems to the queue. Setting the property to the same XML text has no effect! To force a change, append unused data to the XML text (e.g. a counting number):
<SPONSOR Image="MySponsor.jpg"/>123
<SPONSOR Image="MySponsor.jpg"/>124
<SPONSOR Image="MySponsor.jpg"/>125
Text outside the XML element tags is ignored but changes the actual text content. This forces the Ticker to add new items to the queue.
If DataMode is set to Single the ticker processes the TickerItems in the queue. If a graphics element is done (out) the related TickerItems is removed from queue.
If DataMode is set to Loop the TickerItems of the last Data is repeated if the ticker runs Empty. This mode is usually used for static crawls which repeat their content over and over. The data is usually send only once, containing the entire set of elements to be repeated.
Ticker Control
The ticker has some reserved element and attribute names to control the ticker. It also provides two methods (Continue and Reset) and a few output properties and events to control the data feed or other logic.
Queue Control
To control the queue of TickerItems the Ticker provides the following members:
| Method | Reset | Clears the entire queue and removes all visible elements. The Empty flag will be raised. |
| Input | Threshold | If the QueuedItems output property runs below the specified value, the Underrun event is fired. |
| Output | Empty | Indicates if the queue is empty. An empty ticker does not fire Underrun events! Use this flag to start a new ticker from its empty state. |
| Output | QueuedItems | Number of items in the queue. If this value is runs below the Threshold value the Underrun event is fired. |
| Event | Underrun | Fired if the QueuedItems changes and its value is below the Threshold. Empty queues does not fire this event - they raise the Empty flag instead! |
Special Data Elements
Reserved element and attribute names as well as attribute values are interpreted case insensitive!
PAUSE Element
PAUSE is a reserved element name used to create an Element to pause the Ticker. Optional attributes controls additional parameter for it.
- DURATION or D
Optional parameter defining the duration of the pause in seconds. Default is 0.0 (infinite pause). - MODE or M
Optional parameter defining the operation mode of the pause. Three different modes are supported:- IN or I (default)
The ticker will stop as soon the pause TickerItem comes into the visible range. - OUT or O
The ticker will stop as soon the pause TickerItem moves out of the visible range. - CENTER or C
The ticker will stop as soon the pause TickerItem reached the center of the visible range.
- IN or I (default)
Examples:
<PAUSE/>
<pause duration="1.0"/>
<pause duration="2.0" m="center"/>
<Pause D="1.5" M="c"/>
A paused ticker continues to run if either the Continue method is invoked or the duration (if specified) expires.
_PAUSE Attribute
The _Pause attribute can be added to elements to pause these. Other than the Pause Element described above, using the _Pause Attribute allows to pause elements specifically. For example pausing a string in the center or pausing a string when its left edge reaches the left edge of the Ticker area (Ticker Width).
The _Pause attribute accepts up to 3 float values separated by semicolon (default is 0.0):
"duration(0.0);relScreenOffset(0.0);relItemOffset(0.0)"
| duration | Defines the pause duration in seconds. 0.0 results in an infinite pause. |
| relScreenOffset | Allows to pause the element at a specific position in the Ticker area. -0.5 is the left edge, 0 is center, +0.5 the right edge. The parameter is optional. |
| relItemOffset | Specifies the alignment of the element at its paused position. -0.5 is the left edge of the element, 0 is center, +0.5 the right edge. The parameter is optional. |
Examples:
| _pause="" or _pause="0.0" | Infinite pause if center of item is in center of the ticker area. |
| _pause="2.5" | 2.5 seconds pause if center of item is in center of the ticker area. |
| _pause="2.5;-0.5" | 2.5 seconds pause if center of item is on left edge of the ticker area. |
| _pause="2.5;0.5;-0.5" | 2.5 seconds pause if left edge of item is on right edge of the ticker area. |
| _pause="2;0;-0.5" | 2 seconds pause if left edge of item is in center of the ticker area. |
An example element that uses the _pause attribute:
<QUOTE Name="MSFT" LastTrade="123.25" Change="4.125" _Pause="2;-0.25;0.33" />
FILL Element
If a ticker must start with elements filling the visible area instead of moving in the FILL item is used. After resetting the Ticker by invoking the Reset method, send the FILL element as the very first element of the XML data. The ticker fills up and the first real element will start at the out position.
<FILL/>
<QUOTE Name="MSFT" LastTrade="123.25" Change="4.125"/>
<QUOTE Name="AAPL" LastTrade="67.75" Change="2.125"/>
<SPONSOR Image="MySponsor.jpg"/>
The FILL feature is mostly used to start a filled crawl smoothly after if appeared on screen. The smooth start is performed by controlling the Speed property.
Element Notification
There are reserved names used to notify addressed element containers if the Ticker moves it into or out of the visible range. The Container must expose a Method named like the notification type in order to be called by the Ticker.
| TickerIn | Called if the element moves into the visible area |
| TickerFirstIn | Called if the element is the very first element that moves into the visible area. |
| TickerOut | Called if the element moves out of the visible area. |
| TickerLastOut | Called if the container is the last element moved out of the visible area. |
Using these notification may help to trigger special logic or animation related to the notified element. If a global notification is required (like TickerLastOut) to control the entire graphics, it is recommended to create a special END container handling such events. It could expose events to notify the global animation to fade out the ticker. The data should be terminated with that special element to ensure that notification. Such control element can be containers without any graphic nodes!
Custom Spacing
Sometimes it is necessary to adjust the spacing between elements within a Ticker. The ChainOffset property of the Arrange node is a constant offset inserted between all elements. If an individual spacing is required, a Volume node can do that task. The node could be used directly or inside a container. It renders no graphics but defines a size (or a volume) which is honored by the Ticker node. The size could be adjusted as a property in the XML data.